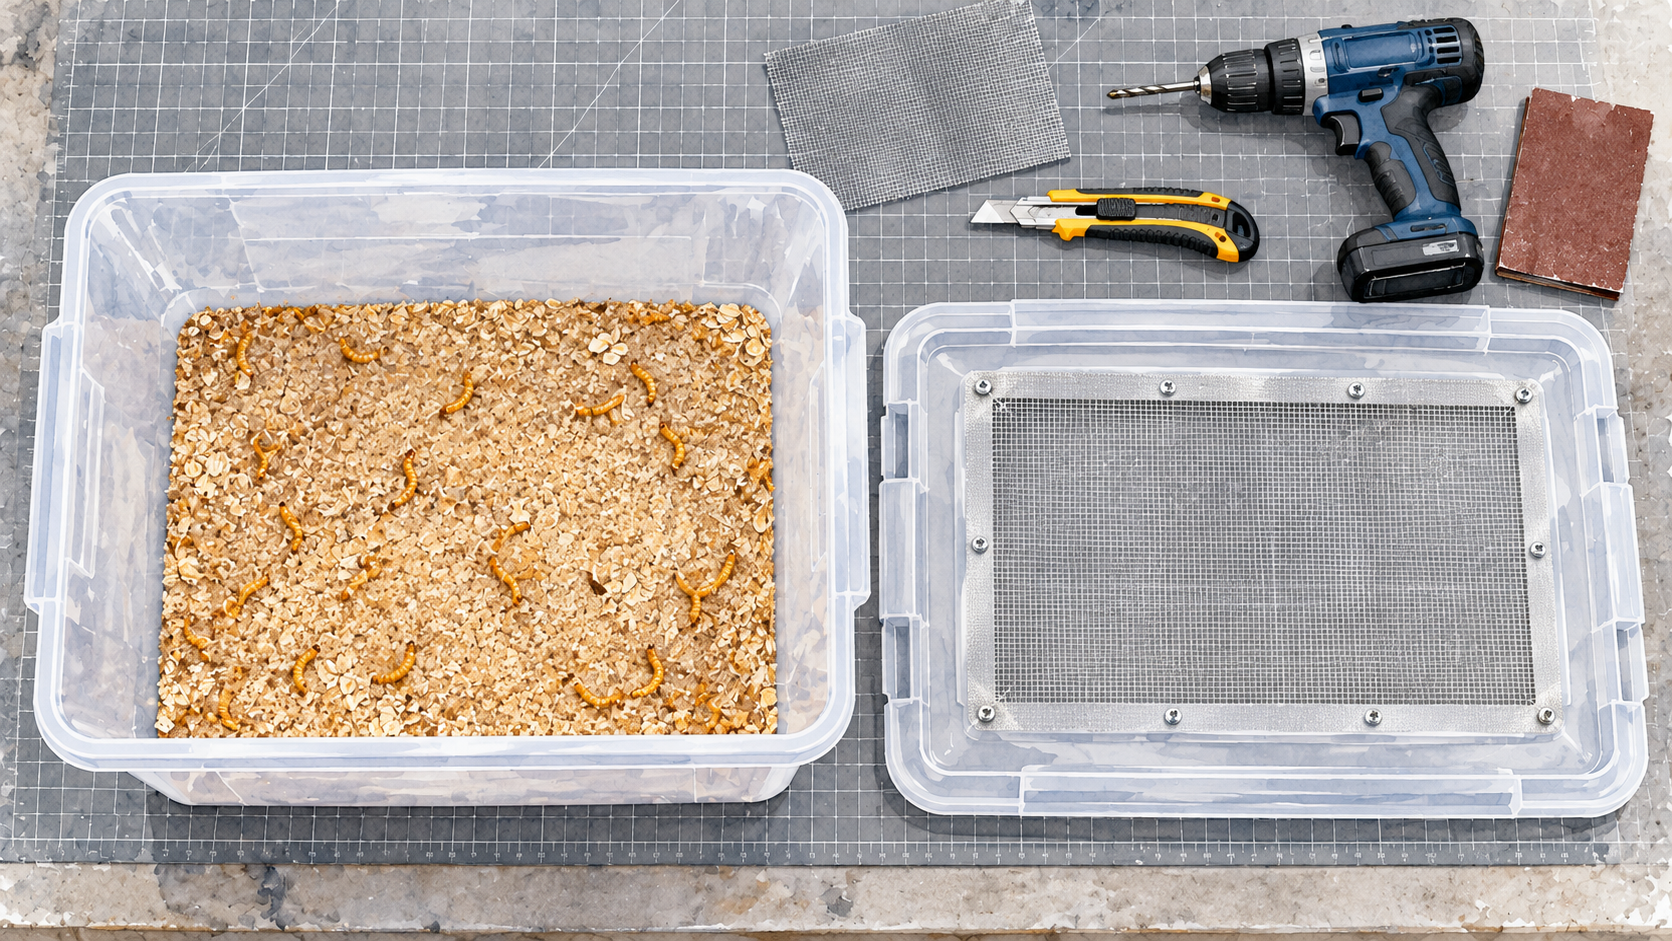
To build a mealworm farming bin, use a clean, smooth-sided plastic container with a secure, ventilated lid, an intact bottom, and enough depth to hold a shallow layer of edible substrate below the rim. Fine insect mesh over ventilation openings allows air to circulate while keeping unwanted insects out. The finished bin should be easy to inspect, open, clean, and move without disturbing the mealworms unnecessarily.
For beginners raising yellow mealworms (Tenebrio molitor), a modified plastic storage tub is usually the simplest option. It requires few tools, has no complicated moving parts, and can accommodate larvae or adult beetles.
What Materials Do You Need?
A basic mealworm bin can be assembled from commonly available household or hardware-store materials.
- Smooth-sided plastic storage tub with a matching lid
- Fine insect-screen mesh
- Drill or utility knife suitable for plastic
- Sandpaper or deburring tool
- Non-toxic, fully cured adhesive or securely fitted mesh fasteners
- Clean wheat bran or another suitable edible substrate
- Ruler, marker, and protective equipment for cutting
A review of mealworm-rearing systems describes plastic and glass containers fitted with covers and ventilation openings. The practical mealworm housing guide likewise recommends containers with ventilated or mesh lids.
Choose materials that are sturdy, washable, and free from chemical residues. Avoid repurposing containers that previously held pesticides, solvents, or industrial chemicals.
What Type of Container Works Best?
A wide, shallow-to-moderately-deep plastic storage tub is generally preferable to a tall, narrow bucket. Its broad floor makes the food substrate easier to spread and allows the keeper to inspect the insects without digging through a deep mass of material.
Rigid polypropylene or similar smooth plastic is useful because it is lightweight, washable, and widely available. Glass is another option, although it is heavier and more easily broken. Cardboard and unfinished wood are less suitable for a durable bin because they can absorb moisture and provide rough surfaces that insects may grip.
The published review of insect-rearing methods describes smooth-walled trays for yellow mealworm beetles and recommends covered systems to limit contamination.
Choose a container with a flat, intact bottom. Deep molded grooves, damaged corners, and inaccessible crevices make it harder to inspect and remove accumulated material.
How Large Should a Mealworm Bin Be?
For a small starter setup, a plastic tub approximately 12–18 inches long, 8–12 inches wide, and 6–8 inches deep is a workable example. These measurements are practical design suggestions, not scientifically established minimums.
Prioritize usable floor area, enough wall height above the substrate, and convenient access through the lid. A very large container is unnecessary for a modest starter population, but a narrow, heavily filled container makes inspection more difficult.
A USDA Sustainable Agriculture Research and Education mealworm project documented the use of modified food-grade plastic bins of different depths, illustrating that more than one container size can work.
The number of insects that can safely occupy a particular floor area is a separate question addressed by mealworm stocking density. Container dimensions alone do not establish its population capacity.
How Do You Add Ventilation to the Lid?
Ventilation is one of the most important construction features. A completely sealed plastic lid restricts air exchange and may allow moisture to accumulate inside the container.
A straightforward approach is to mark a rectangular opening in the central section of the lid, leaving a substantial uncut border to preserve its strength. Cut or drill the opening, remove sharp edges, and fasten fine insect-screen mesh over it.
In the SARE mealworm farming project, growers modified food-grade plastic lids with rectangular screened openings. A scientific review of Tenebrio molitor rearing also emphasizes sufficient ventilation through openings in the cover.
The exact vent size depends on the lid’s dimensions and rigidity. It should provide meaningful airflow without weakening the lid or leaving gaps insects can pass through.
What Kind of Mesh Should You Use?
Fine insect-screen mesh is more appropriate than coarse hardware cloth because the objective is to allow airflow while excluding small flies, mites where practicable, and other unwanted visitors.
The mesh should have openings sufficiently small to prevent the insects being housed from escaping and to discourage pests from entering. Inspect the screen itself for holes, loose strands, and gaps around the edges.
A review of mealworm production equipment recommends screened ventilation windows for enclosed rearing systems. The SARE construction example demonstrates fastening insect screening over cut lid openings.
Secure the mesh so its edges cannot lift when the lid is opened or handled. If adhesive is used, keep it outside the insects’ reach, follow the manufacturer’s curing instructions, and avoid placing insects in the container until all fumes have dissipated.
Should You Drill Holes in the Sides or Bottom?
For a simple beginner bin, screened openings in the lid are often sufficient. Additional high side vents can improve air exchange if the design needs them, provided they are securely covered with fine mesh.
An intact bottom is preferable to a perforated one. Holes in the base allow substrate, tiny larvae, eggs, and waste to escape and can make cleaning more complicated.
A conventional bin is different from a specialized sifting system. The latter deliberately uses screens and openings to separate materials, but those features are unnecessary for a straightforward single-container design.
Position any side vents well above the substrate surface. This reduces the risk of food particles accumulating against the mesh and provides a greater barrier against climbing insects.
Why Are Smooth Interior Walls Important?
Yellow mealworms and their adult beetles generally have difficulty climbing clean, smooth plastic or glass. Rough surfaces, exposed fabric, adhesive ridges, and accumulated material can create footholds.
The scientific review of insect-rearing techniques describes how smooth surfaces allow adult Tenebrio molitor beetles to be maintained in relatively shallow trays. A secure cover is nevertheless recommended to protect against unwanted insects and contamination.
Inspect the inside of the bin after modifying it. Remove burrs left by drilling, adhesive protrusions, loose tape, and anything that could act as a ladder toward the lid.
A smooth wall is helpful but should not be the only safeguard against escapes. Leave sufficient clearance above the substrate and use a properly fitting lid.
How Deep Should the Substrate Be?
A starting layer of approximately 1–2 inches of loose, dry edible substrate is convenient for many small bins. Some mealworm-keeping instructions use 2–3 inches, so the appropriate depth varies with the container and its intended use.
The mealworm housing instructions recommend wheat bran or oats as combined food and bedding. An insect-rearing manual also describes mealworm containers filled with a grain-based medium.
Avoid filling the bin near the lid. Keep several inches of smooth, unobstructed wall above the substrate so larvae and beetles cannot easily reach openings or lid edges.
The comparison of mealworm substrates addresses the advantages of different edible materials. Here, the main construction concern is choosing a depth that leaves sufficient clearance and permits easy inspection.
How Can You Make the Bin Easy to Access?
Choose a lid that lifts off or opens without excessive force. A stiff lid that must be pried loose can shake the contents, while an ill-fitting lid may leave gaps.
The container should be light enough to move safely and wide enough that you can reach its corners during inspection. A transparent or translucent tub makes it easier to check substrate depth and observe insects near the sides without opening the lid.
Simple labels can identify the bin’s contents and the date it was prepared. This becomes useful when more than one container is in use, but a beginner does not need a complicated identification system.
Keeping the interior uncomplicated also helps with routine mealworm farm cleaning. Avoid permanent internal partitions or decorative materials that trap food particles unless they serve a clear purpose.
How Do You Test the Bin Before Adding Mealworms?
Inspect the completed container before introducing any insects. Confirm that the lid closes securely, all mesh edges are attached, and ventilation openings have no uncovered gaps.
Run a hand carefully along the cut edges to check for sharp points, then remove plastic fragments and construction dust. Wash a new or modified bin with an appropriate mild cleaning product, rinse thoroughly, and allow it to dry completely.
Set the empty bin on a level surface to check that it does not tip or flex excessively. If containers will be placed on shelves, make sure the lid vents remain unobstructed.
A well-built enclosure is only one part of starting a mealworm farm. The purpose of this construction check is simply to make the container secure, breathable, and accessible before use.
Questions About Mealworm Bin Construction
Can you use a glass aquarium for mealworms? Yes. Glass has smooth sides and is easy to inspect, but it needs a secure ventilated cover and is heavier than plastic.
Does a mealworm bin need drainage holes? A basic dry-substrate bin generally does not. An intact bottom helps contain insects and food particles.
Can mealworms escape through ventilation holes? They may escape through accessible openings or gaps, particularly if substrate or rough surfaces provide a route upward. Fine mesh and adequate wall clearance reduce the risk.
Do you need a special mealworm farming container? No. A suitable smooth-sided storage tub can be modified into a functional bin without specialized commercial equipment.
6 thoughts on “How to Build a Mealworm Farming Bin”