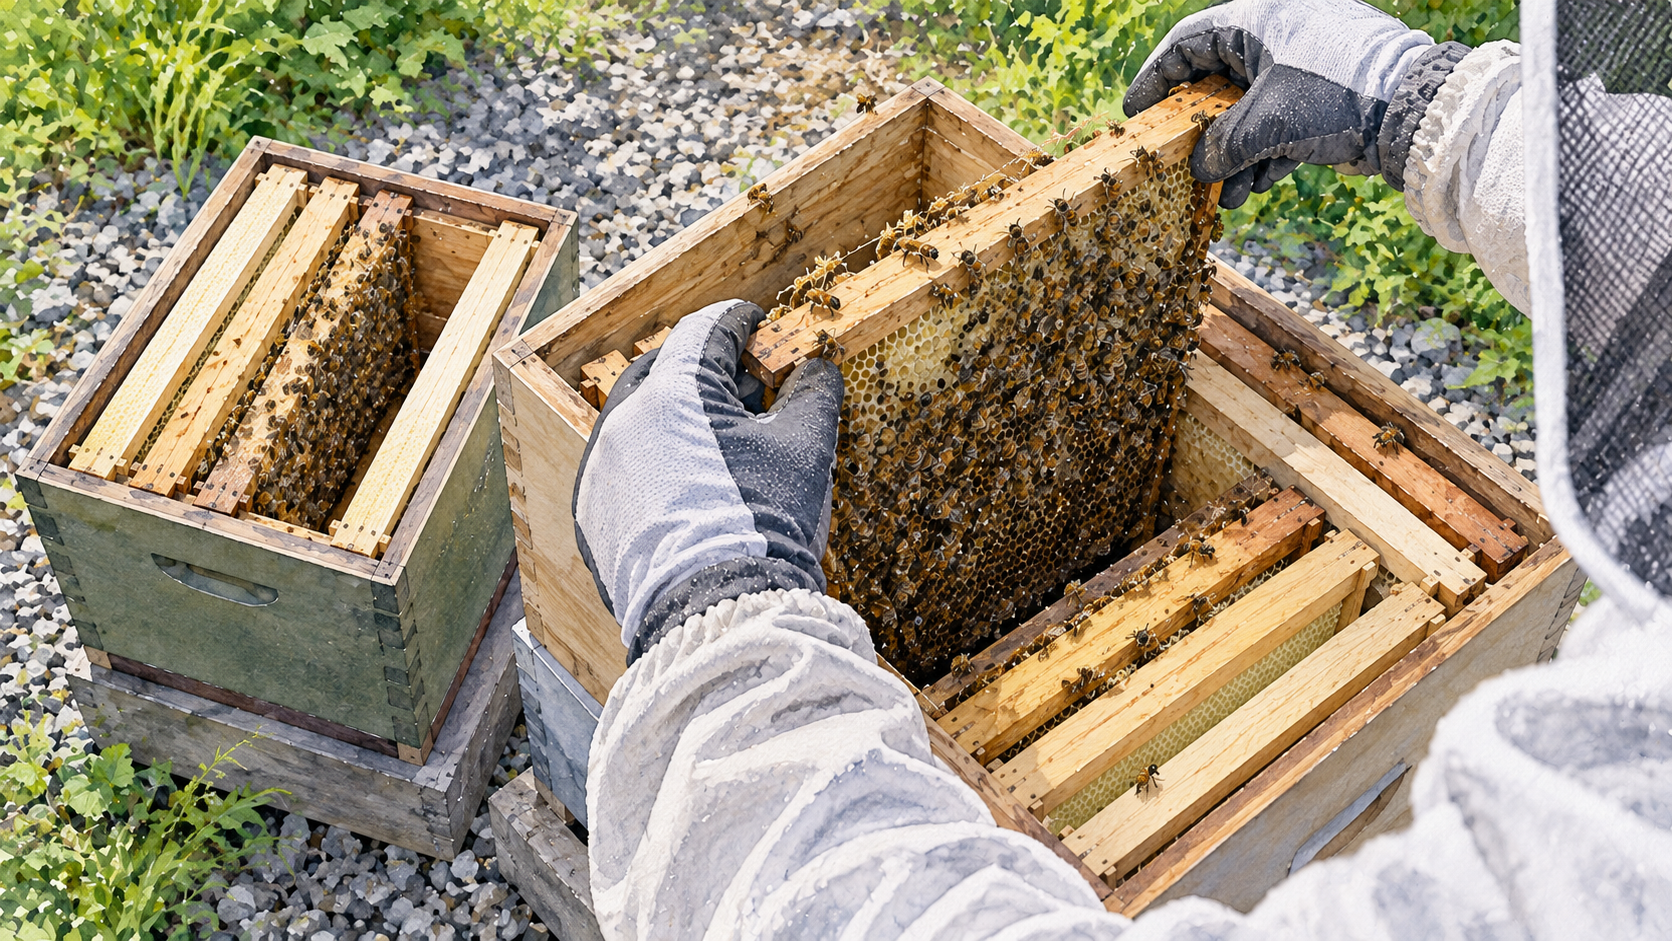
Installing a nucleus honey bee colony means moving its established frames, worker bees, and laying queen from a small transport hive into a larger managed hive. The safest basic method is to keep the original frames in the same order and facing the same direction, leave the brood nest intact, and give the bees enough room to expand without exposing brood or crushing the queen. A five-frame Langstroth nuc normally transfers into a compatible eight- or ten-frame brood box.
The guide covers the transfer and early checks, not the separate process of installing loose package bees.
Prepare a Compatible Hive Before Bringing the Nuc Home
Have the receiving hive fully assembled at its intended location before collecting bees. At minimum, it needs a stable stand, bottom board, brood box, properly fitting frames, inner and weatherproof outer covers, and an entrance that can be adjusted for a developing colony. Have a compatible feeder available, and dry-fit all parts while the hive is empty.
A five-frame deep Langstroth nuc requires a brood box that accepts those same deep frames. Some nucs contain medium frames, and other hive systems use different frame dimensions. An eight-frame or ten-frame box describes its total frame capacity, not the size of the individual frame. Verify the supplier’s actual frame type before pickup. The distinction is explained in beehive frames and foundation. If the purchased nuc frames will not hang correctly in your hive, do not improvise unsupported adapters during the transfer. Ask the supplier about compatible equipment first.
Set aside enough sound, correctly sized empty or foundation-equipped frames to fill the space surrounding the nuc. Using clean, suitable drawn comb can help bees expand, but equipment with an unknown disease history is not a shortcut worth taking. Keep old comb from dead colonies out of the receiving hive until its safety is established. A nuc already contains brood and food stores, as explained in nuc installation guidance.
Place a hive tool, veil and suitable protective clothing, a ready-to-use smoker, a frame rest if useful, and an empty box or secure stand for temporarily holding frames within reach. An assistant who already handles bees confidently can help with a first transfer. Wear secure, well-fitted protective clothing that permits careful movement. Do not begin until livestock, children, bystanders, and pets can stay clear of the work area.
Transport the Nuc Without Overheating or Shaking Its Frames
A nucleus colony contains live brood and many bees in a confined box. Keep the frames upright, secure the box against tipping, and follow the supplier’s ventilation instructions. Never obstruct screened vents with blankets or cargo. Keep the nuc out of direct sun and make the trip home without unnecessary stops. Do not leave bees in a parked vehicle, even briefly: temperatures can rise rapidly and overheating may kill a crowded nuc. The nuc transport guidance emphasizes cool transport and prompt arrival.
Before arranging an interstate pickup, check origin and destination apiary movement rules: some states restrict importing bees on comb, so a nuc cannot automatically cross state lines. The jurisdiction-specific checks belong in the beekeeping permit and registration guide.
Before unloading, distinguish the entrance from separate ventilation screens. A travel plug must contain bees without blocking the intended air exchange. Avoid opening the entrance inside the vehicle or while standing among unprotected people. Move the nuc gently, with frames vertical.
At the apiary, position the nuc where the new hive entrance will be. Open its entrance at the supplier-directed time once the nuc is secure and people are clear, unless proceeding directly to transfer. A nuc that must wait for acceptable weather should be sheltered from rain and overheating, kept ventilated, and given unrestricted bee access at its permanent site. A crowded colony should not remain in a small transport box for days merely because its new equipment is unfinished. If the nuc is damaged, overheating, or shows substantial transport losses, contact the supplier promptly before a routine transfer.
Let the Bees Orient and Choose a Suitable Transfer Window
Many suppliers advise opening a nuc at the future hive site and allowing the bees a few hours or until the next suitable day to orient before transferring frames. The temporary nuc entrance should face the same direction as the receiving hive. When the nuc is moved aside for installation, place the full-sized hive as close as possible to the position of that familiar entrance. Returning foragers can then find the new opening with less confusion. A seller’s practical installation sequence uses that short settling period before transferring frames.
There is no universal waiting period. A strong, crowded nuc may need space sooner, while cold rain or gusty wind makes an exposed brood transfer more hazardous. Work during a mild, dry period when bees are flying normally, preferably with daylight left and no forecast that would force you to rush. In some regions, the spring installation season arrives much later than in the southern United States. The timing depends on weather and the colony’s condition, not the calendar date alone.
Some extension instructions allow several days for orientation, while other suppliers recommend transferring within hours or the following day. Neither is universal: keep the nuc ventilated with its entrance safely open when held at the site, and ask the seller how long its actual colony and transport box can wait. A crowded nuc must not remain confined with a closed entrance. The full-size hive should already be ready; the apiary location should not still be under consideration after bees begin orienting to it.
Open the Nuc and Give Yourself Room to Lift Frames
Position the brood box at the familiar entrance site, with the nuc safely beside it. Remove enough frames from the receiving box to create a clear central working gap, and put them where they cannot fall or pick up dirt. For a five-frame nuc in a ten-frame box, removing six frames at first provides room for the five incoming combs plus an extra gap for controlled movement. Return the extra frame before closing; a properly fitted frame feeder may occupy one or more positions instead.
Wear your veil and gloves as needed, check that the smoker is producing cool, controlled smoke rather than sparks, and lightly smoke across the top of the nuc frames if the colony is defensive. A nuc already has brood and stores, so it may defend its small box. More smoke is not a substitute for steady handling. The detailed lighting and fire precautions belong in using a bee smoker safely. Do not use a smoker during applicable fire restrictions.
Break any propolis seal on the lid with the hive tool, lifting without a sudden jerk. Loosen the outermost frame first to create room for the rest. Work the tool against wooden frame parts, not capped brood, soft wax, or clustered bees. If the first frame is tightly attached to the side wall, ease it free in small movements and keep the comb upright. The safe leverage techniques for a hive tool are useful here. Once the frame begins moving, lift it vertically over the open nuc so loose bees fall back inside rather than onto the ground.
Move the Nuc Frames in the Same Order and Direction
Treat the original five frames as one organized group. Start from an outside frame and move across the nuc in sequence. Set each frame into the receiving box beside the preceding transferred frame without turning it end for end. Keep the same face pointing toward the same side of the hive. Place the intact group together, usually near the center of the full-size brood box, leaving space on both sides for compatible frames. Do not alternate brood frames with sheets of empty foundation simply to distribute new comb-building work.
Brood usually occupies neighboring central combs, often bordered by food stores; clustering workers regulate the brood environment. A frame full of honey inserted between brood frames can split that group, making it harder for workers to cluster around and warm the developing bees. Existing comb faces can also have complementary bulges and recesses. Rotating one irregular frame may force those shapes together and crush workers or damage brood. The technical explanation of original comb order and orientation details both risks.
Lift each frame by its top bar or suitable frame grips, supporting heavy comb without tilting it sharply. Pause above the nuc to check that adjacent comb is not still stuck to the one you are removing. Look briefly for eggs, young larvae, capped brood, stored food, and bee coverage as the frame passes, but avoid a prolonged diagnosis during the transfer. If you happen to see the queen, remember which frame she is on and move that frame with particular care. You do not have to find her to complete a normal nuc installation.
Centering the unchanged frame group is a sound beginner default because new frames can be added on its outer sides. Other layouts can work if the brood stays contiguous and all frames and feeders fit correctly. For a first transfer, preserving the nuc’s organization is more important than rearranging its combs to match a diagram.
Protect the Queen and Move the Remaining Workers
A normal production nuc usually contains a freely moving laying queen, so no candy-plug or queen-cage release is needed. The principal queen hazard is physical injury: trapping her between frames, dropping a frame, brushing her roughly, or closing a box on a bee-covered edge. Keep all frame movements slow enough to notice clusters collecting where wooden parts will meet.
If you spot the queen, leave her on her frame and transfer it intact. A marked queen is easier to recognize, but a mark is not a guarantee that she is on the frame you expect. Eggs indicate recent laying, not proof the queen survived transport. If you never see her, proceed with the frame transfer rather than repeatedly exposing brood in an effort to locate her. The first follow-up provides a better opportunity to assess continued laying.
After the last comb is installed, check the original nuc box for a remaining cluster. Some workers will be clinging to the walls or bottom. Holding the box above the receiving hive, use a gentle, controlled tap to dislodge bees into the open brood box without striking frames or tipping the box onto comb. Avoid vigorous shaking of the transferred brood frames. If a large cluster remains, pause and examine the nuc walls for the queen before forcing the bees out. Seek help if the queen is loose in an awkward corner or you cannot transfer her safely.
A few flying workers may return to the old nuc position. Put the emptied box close enough for stragglers to find the new hive, without blocking the entrance or exposing brood comb or feed to rain and robbing bees. Remove it once workers have dispersed. Do not leave exposed comb or food available to robbers.
Complete the Brood Box Without Squeezing the Bees
Once the nuc’s original frames form a continuous group, return the compatible empty or foundation-equipped frames around them. For a five-frame nuc in an ordinary ten-frame box, the full arrangement generally ends with ten frames. An eight-frame hive ends with eight. A frame feeder may occupy more than one frame position; follow its fit instructions rather than forcing in extra frames.
Lower the final frames slowly while watching for bees walking on frame rests and side bars. Press adjacent wooden frames together to establish their designed spacing, but do not use the hive tool to squeeze a mass of bees into a closing gap. Gently clear workers from the rim before installing the inner cover, and lower the outer cover under control. A cover resting on a protruding feeder or a frame left proud of the box can create an entrance for pests and rain.
Make sure the hive entrance stays open for orientation flights and ventilation. An entrance reducer can help a developing colony defend its opening from robbing, but it must not become a complete closure or prevent necessary airflow. Secure the cover against weather, check that the feeder cannot spill into the brood area, and step away to observe flights without standing in front of the entrance. The goal is an intact brood nest, safe entrance, and room for expansion—not a cell-by-cell inspection.
Decide Whether the New Colony Needs Supplemental Feeding
Although a nuc arrives with stored food, a cold spell or nectar dearth can interrupt its supply. Feeding can also support the drawing of new foundation. Evaluate the amount of stored honey, incoming nectar, the amount of undrawn foundation, and how quickly workers are using a clean, protected feeder. If the nuc is short of resources or needs to build several new combs, light sugar syrup is a common establishment feed.
A 1:1 mixture of white granulated sugar and water by weight is a documented option for stimulating spring comb construction. Prepare it in clean equipment without burning or caramelizing the sugar. Use an internal or covered top feeder with bee-safe access so syrup does not leak, drown workers, or attract robbers. An exposed entrance feeder can be a particular problem when stronger colonies are nearby. The new-colony feeding discussion explains why accessible protected feeders matter as much as the recipe. The broader choice of when, how, and how long to feed belongs in feeding honey bees sugar syrup.
Watch for both extremes. A colony short of carbohydrate may struggle to draw comb and maintain stores, but syrup filling brood cells can limit the queen’s laying space. If nectar is abundant and bees are building comb well, feeding may be unnecessary or should be reduced. Do not feed syrup with harvest honey supers in place: the bees may store syrup in comb intended for human consumption, as explained in new-colony feeding advice. Likewise, do not feed honey from unknown colonies; bee diseases can spread through contaminated material.
Provide clean water with safe landing surfaces. Syrup does not substitute for pollen, brood-health checks, or mite monitoring.
Check Establishment Without Reopening the Hive Every Day
Observe the entrance from a safe distance during the first days. Orientation flights and pollen-bearing workers suggest normal activity, but do not prove that the queen is laying or that mite pressure is low. Because a nuc has established brood, an early frame check can provide more evidence than entrance activity alone.
Plan a brief inspection roughly four to seven days after installation if the weather is suitable, following the supplier’s more specific directions where given. Verify food access, queen activity through eggs or young brood, how the bees cover existing brood, whether frames are being drawn, and whether the hive has adequate space. You usually do not need to locate the queen visually. A practical nuc installation follow-up also uses a short first-week check rather than daily dismantling.
| Stage | Useful observation | What the observation cannot prove |
|---|---|---|
| Delivery and transfer | Frames, adults, brood and food are present; nuc does not show acute transport distress | That the colony is free of disease or Varroa |
| First days | Normal flights, protected feeder access and no major syrup leak | That the queen has survived and is still laying |
| First suitable inspection, about days 4–7 | Eggs or larvae, covered brood, usable food and some comb expansion | That all brood disease and mite risks are absent |
| Following week, as conditions permit | Continuing brood development, more comb use and enough space for growth | That a weak or declining colony will recover without further assessment |
A lack of eggs at one brief visit deserves investigation, not an instant queenless diagnosis. Poor light, a delayed handoff, cold weather, or overlooking tiny eggs may explain uncertainty. If fresh eggs and very young brood remain absent on a subsequent suitable check, contact the supplier or an experienced local beekeeper promptly while options to correct queen problems remain available. The longer monitoring plan is covered in the first month of new-hive care.
Nucs can arrive with Varroa mites even when they look vigorous. Obtain the seller’s recent monitoring information and plan your own appropriate mite checks once the colony is established enough for a reliable sample. The Varroa management guidance specifically notes that introducing nucs can move mites between apiaries. Follow the mite-monitoring methods in checking a beehive for Varroa rather than judging infestation by whether mites are visible on a few workers.
Resolve Common Installation Problems Before They Become Losses
The frames do not fit the receiving box. Stop before opening the nuc if the incompatibility is already known. Deep frames cannot simply be hung in a medium box, and a different frame system may have incompatible end bars or rests. Keep the nuc safely ventilated and contact the supplier for a matching brood box. Do not leave brood comb unsupported or cut living comb to make it fit during a routine beginner transfer.
A frame is stuck or the comb is bulging. Loosen the wooden frame ends gradually and lift vertically. Do not wrench the top bar until it breaks or rotate the irregular comb to force it against its neighbor. Preserve the established facing and spacing, and get experienced help if damaged wood or cross-comb makes removal unsafe. A poorly shaped comb should not be forcibly corrected during a transfer while it contains brood and crowded bees.
The queen cannot be found. This alone is not a failed installation. Check for normal brood and recently laid eggs without prolonged searching. If the queen is seen inside the empty nuc box, halt careless shaking and arrange her safe transfer; if she is injured or missing and no recent laying can be verified later, consult the supplier promptly. Do not release a replacement queen into a colony that may already be queenright.
The colony is not expanding. Examine forage, stores, weather, space to draw comb, and recent brood development. A nuc may need time and supplemental feed, but stagnant development can also reflect disease, a queen problem, or high mite levels. Discolored or sunken brood cappings, abnormal larvae, unusual odors, or widespread deaths warrant advice from a qualified local bee inspector or experienced bee-health specialist. Do not move suspect comb into other healthy colonies, reuse contaminated tools without appropriate biosecurity, or treat brood disease based solely on appearance. Source quality and disease history should have been evaluated before collection, as explained in choosing healthy honey bees before buying.
Bees crowd the entrance or robbing begins. Check for spilled syrup, wide gaps, and uncontrolled access by other bees. Clean spills and consider an appropriately reduced entrance without obstructing ventilation. If the colony is extremely defensive, bees are flying in a frantic fighting pattern, or the working conditions have become unsafe, close the hive carefully and reassess with an experienced helper rather than extending the disturbance.
Questions About Installing a Nucleus Colony
What if the nuc contains four or six frames instead of five? The procedure is the same, provided every transferred frame fits the receiving brood box. Move the nuc frames as one continuous group, retain their original direction, and fill remaining positions with compatible equipment. Count the spaces before opening the nuc. If a supplied frame does not fit, stop and obtain the correct box rather than leaving brood unsupported.
What if foragers return to the old nuc box after the transfer? Some bees will look for the entrance they used before installation. Keep the full-sized hive at approximately the same entrance position and temporarily set the emptied nuc nearby without blocking the new opening. Once bees have moved across, remove the empty box; do not leave exposed honeycomb or syrup that could attract robbing. If many bees continue clustering away from the hive, reassess entrance alignment and ask an experienced local beekeeper for help.
Does a nuc queen need to be released from a cage? Usually not. A standard production nuc normally contains a freely moving laying queen. A supplier may occasionally provide a special arrangement with a caged queen. In that case, follow the instructions for that particular queen and cage rather than assuming the routine package-bee release procedure applies. Do not open a cage just because the queen is not yet visibly laying.
When should another brood box be added? Do not add extra space automatically on installation day. First confirm that the colony is using and drawing the available frames, has enough workers to occupy the added area, and is building steadily in local conditions. A very strong nuc may expand quickly, but a slower one should not be forced into a large, difficult-to-defend space. The evidence for expansion is covered in recognizing when a hive needs more room.