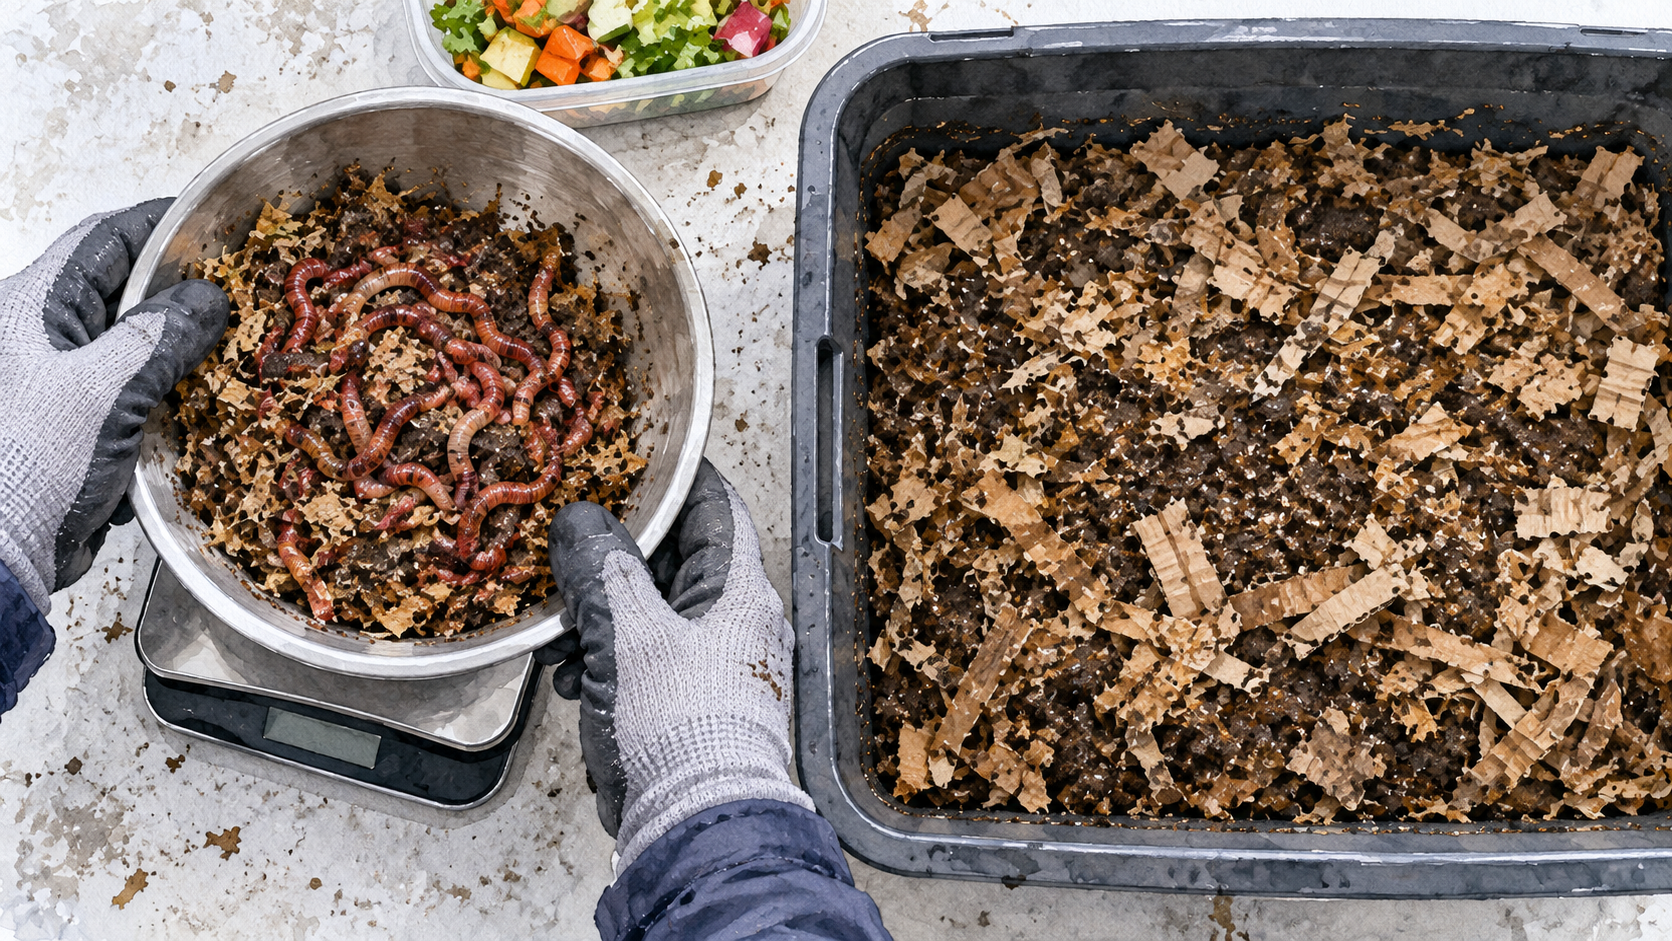
About half a pound to one pound of composting worms is a practical starting amount for many small, sheltered household worm farms. A pound of red wigglers is commonly described as roughly 1,000 worms, although the actual count depends on their size and age. Starting with more worms can help process a steady supply of scraps sooner, but only when the bin has enough usable space and suitable bedding. A smaller colony can grow over time if you are willing to begin with lighter feeding.
The right purchase is therefore not determined by bin gallons alone. Start with the amount of suitable food you expect to provide, how much of the bin’s working surface the worms can use, and whether your goal is to compost scraps promptly or breed a colony gradually.
A starting purchase is different from an established bin’s stocking capacity; first check worm quality and the amount the colony can realistically process each day.
Why worm sellers quote pounds instead of an exact head count
Red wigglers (Eisenia fetida) are usually bought by weight because hand-counting hundreds of moving animals is impractical. Iowa State’s vermicomposting questions treat about 1,000 worms per pound as a general estimate. Maryland Extension gives approximately 500 to 1,000 for a pound of redworms. Both descriptions can be reasonable for differently sized or mixed-age stock.
A pound containing larger breeding adults does not have the same head count as a pound containing many smaller juveniles. Ask whether the stated weight covers live worms alone or a mixture of worms, cocoons and shipping bedding. A container of damp substrate weighing a pound is not necessarily a pound of worms. Likewise, a listing of “1,000 worms” cannot establish their combined biomass without an age or size description.
For a beginner comparing starter packages, approximate live worm weight is more useful than a supposedly precise count. The figures in this article apply to red wiggler-type composting colonies, not to an unspecified collection of garden earthworms or bait worms.
Measure your usable scraps before choosing a starter population
Collect the fruit and vegetable scraps, coffee grounds and other materials you would realistically offer a worm bin over seven ordinary days. Weigh only this suitable portion, not the entire household garbage bag. Record the weekly amount. You may find that a household producing several pounds of total food waste has considerably less material appropriate for the worm bin.
Feeding estimates in reputable guidance are notably different, even when all describe red-wiggler bins. Penn State’s introductory vermicomposting article describes approximately half a pound to one pound of scraps per week for a pound of worms in an established bin. UC Santa Barbara’s feeding guide describes an active, warm population consuming as much as half its weight per day, equivalent to 3.5 pounds per week for one pound of worms. Oregon State’s composting guide uses its own bin-size and weekly-input assumptions.
Those are not interchangeable guarantees. The rate can also change with whether a guide weighs fresh kitchen scraps, partially decomposed organics or bedding along with the feed. They describe different operating conditions, food preparation and assumptions about established populations. Freshly shipped worms may feed less while they adjust, and bacteria and other organisms participate in decomposing scraps. As an initial planning decision, give more weight to the lower, readily observable feeding rate than to an ideal maximum. Store, conventionally compost or otherwise manage any scraps the new colony cannot yet process.
Starter quantities for three realistic goals
The choices below are editorial starting scenarios, not independently tested thresholds. UConn Extension explicitly recommends half a pound to one pound for a household bin, while the EPA’s home composting instructions and Maryland Extension commonly use a one-pound starting amount. The larger-input scenario is a cautious trial recommendation, not a prediction of how much waste a new colony will consume during its first week.
| Initial goal | Practical first order | What to expect at first |
|---|---|---|
| Learn with a small amount of scraps and no urgent processing target | Around ½ pound of worms | Slow, manageable feeding; leave the rest of your scraps to another disposal or composting route |
| Start a typical sheltered household bin with regular, moderate scraps | Around 1 pound of worms | A commonly recommended baseline; increase feeding only after observing what disappears |
| Plan a larger bed or a continuous supply of several pounds of scraps each week | 1 pound as a trial, then reassess before purchasing additional worms or creating more processing space | The full waste stream may exceed starter capacity for weeks or months; a larger system needs its own plan |
For the third case, beginning with one pound is a cautious commissioning choice, not a claim that one pound will quickly establish a commercial bed. A farm that must process a known quantity of organics immediately needs to model its feedstock, available space and established processing capacity separately. Buying the whole eventual worm population on day one is not a substitute for learning whether its proposed environment is suitable.
Example: a household collects 2½ pounds of scraps each week
Suppose seven days of weighing shows 2½ pounds of worm-suitable scraps per week, and the household has a shaded, ventilated tote ready. It chooses one pound of red wigglers as a conventional household starter. That purchase establishes an initial colony, not a commitment to feed all 2½ pounds straight away.
A modest first feeding of about a quarter pound after the worms are placed in prepared bedding follows the illustrative introduction in the 2026 UC Master Gardener guide. The operator checks after several days whether that food is breaking down without heat, foul odors or soggy bedding. Further additions depend on the bin’s response; the remaining scraps have to be kept out of the bin until it can process them. This small measurement-and-observation loop is more informative than calculating a large initial worm order from the full weekly waste weight alone.
Make sure the bin has room for the worms you buy
Red wigglers occupy organic-rich bedding near the surface, so usable width, length and breathable bedding matter more than simply buying a deep container. A shallow bin with accessible feeding areas can be more workable than a tall bucket holding the same number of gallons. The EPA’s indoor-worm-bin instructions and Oregon State’s design discussion emphasize suitable ventilation, drainage and conditions rather than depth for its own sake.
Published numerical rules differ. NCAT’s vermicomposting guide uses approximately one pound of worms per cubic foot of bed space as a broad guideline, while other university guides use starting amounts for particular surface areas and bin styles. Those relationships can inform design, but they should not be treated as universal minimum purchase requirements for an empty bin. A 20-by-16-inch usable floor measures approximately 2.2 square feet. That number tells you how much surface is available, not that you must immediately purchase 2.2 pounds of worms.
Before ordering, check that the planned bedding is loose and moist, air openings remain clear, excess liquid can escape and the bin will be sheltered from direct sun and freezing. Avoid putting a very large worm shipment into a tiny starter tote because its gallon label sounds generous. Once the colony is established, determining its ongoing stocking density is a separate management question.
A breeding project can start smaller, but takes patience
If the main goal is to grow a breeding colony rather than dispose of all weekly scraps, a half-pound starter can be reasonable when you have time and can maintain suitable conditions. Adult red wigglers reproduce sexually and produce cocoons; a small mixed-age group can establish gradually. You do not need to buy two separately labeled “male” and “female” groups. Oregon State explains red wiggler reproduction and cocoon development.
Some guidance describes colonies doubling in roughly two months under favorable circumstances, while UConn’s farm vermiculture guide cites four months under ideal conditions. These are potential growth descriptions, not a timetable promised to every newly stocked bin. Population change depends on the starting mix of adults and juveniles, available bedding and food, temperature, moisture, losses and handling. Visible cocoons after several weeks show that reproduction may be occurring; they do not prove that population size has already doubled.
For a breeding-first setup, record the initial live worm weight and introduction date. Check for a mixture of active adults, juveniles and cocoons over the following months, without repeatedly turning the entire bin upside down to count individuals. If you need a large colony by a fixed date, relying solely on the fastest reported doubling estimate would be risky.
The first two weeks should set the feeding pace
Prepare the bin before the worms arrive, then transfer the worms gently into moist, breathable bedding. A recently shipped population may need time to settle. UC Master Gardeners suggest a small initial food addition, followed by an inspection several days later. The EPA’s home guide likewise describes starting with a prepared bin rather than introducing worms to an unsuitable container.
Check the same small feeding area after a few days. If scraps are still present, they may simply need more time. Do not bury another large load on top of them. When the food is breaking down steadily and the bin smells earthy rather than sour, additional small portions may be appropriate. If material heats up, bedding becomes waterlogged, or worms repeatedly gather on the walls and attempt to leave, stop increasing feed and assess the environment first. These signs do not diagnose one specific cause.
You should also know where the leftover scraps will go during this adjustment period. An initial order does not make the bin ready to handle all of its future feed. Give the new colony several weeks of observed, consistently safe processing before planning around a steady workload. Increasing worm numbers through breeding is a separate, slower process that may take months.
When to add more worms instead of waiting for reproduction
Consider expanding the colony only when both of these conditions are met: the existing worms are consistently working through reasonable portions of suitable material, and the system has additional usable capacity without crowding, heat buildup or drainage problems. Oregon State notes that excessive food can create low-oxygen conditions, while too little food can slow growth and reproduction.
A decision log can help separate a shortage of worms from a problem with the habitat. Record the approximate weight of each addition, the date, whether recognizable scraps remain by the next check, and any strong smell or escaping behavior. A single unfinished piece of tough food is not sufficient evidence of a population shortage. Likewise, rapid disappearance in one warm week is not proof that the bin can maintain that rate through colder conditions.
If processing remains slow while the bin is damp, compacted or too cold, adding more worms may create more stress rather than more output. Correct the habitat first. If conditions are stable and the available working surface and feed supply genuinely exceed what the colony handles, a gradual population increase or an additional bin is a more defensible next step than a sudden large order.
Do not confuse a healthy starter order with environmental containment
Get the worms from a source that identifies the composting species and describes what is included in the package. This quantity guide assumes genuine composting worms, not whatever worms happen to be available in a garden or sold as bait. Supplier identification, transport quality and quarantine considerations warrant their own checks before introduction.
Keep a purchased colony contained. Minnesota’s Department of Natural Resources warns that worms sold for composting may be contaminated by jumping worms and that organisms and cocoons can move in organic materials. Never dump unwanted worms, their bedding or unfinished material into woods, streams or other natural areas. Species rules and restrictions vary by state and locality, so verify them before ordering or moving live worms.
Questions that affect the initial order
Can I begin with only 100 worms? A small verified group of composting worms may reproduce, but it is a slow experiment, not a practical way to process a normal household’s scraps promptly. Very light feeding and close attention are essential. A half-pound to one-pound order offers a more useful established starting mass for most household projects.
Should I buy 2,000 worms for a 20-gallon bin? Not from the gallon figure alone. Two thousand is only an approximate count and may mean different live weights. Check the container’s usable surface, current bedding, available food and the supplier’s worm-size description before deciding. More worms than the system can support do not make the habitat safer.
How soon will I have twice as many worms? Published favorable-condition estimates range from about two to four months, but a new colony can take longer. A date-specific doubling promise would require information about the animals’ initial ages, survival, food and conditions that a simple starter order rarely supplies.